Chromaplane For Live
〰️
Chromaplane For Live 〰️
Chromaplane for Live is a Max for Live device that you can use to control external synthesizers and Ableton instruments using the Chromaplane.
It is an device that converts audio from the Chromaplane's pickups into a duophonic digital synth voice. It can also route a MIDI translation of the detected pitches to your MIDI tracks in live.
Getting Started
You’ll need the following to make use of the device:
Your Chromaplane
Two pickups
An audio interface/sound card
A computer
Ableton Live Suite version 11+
Basic Setup
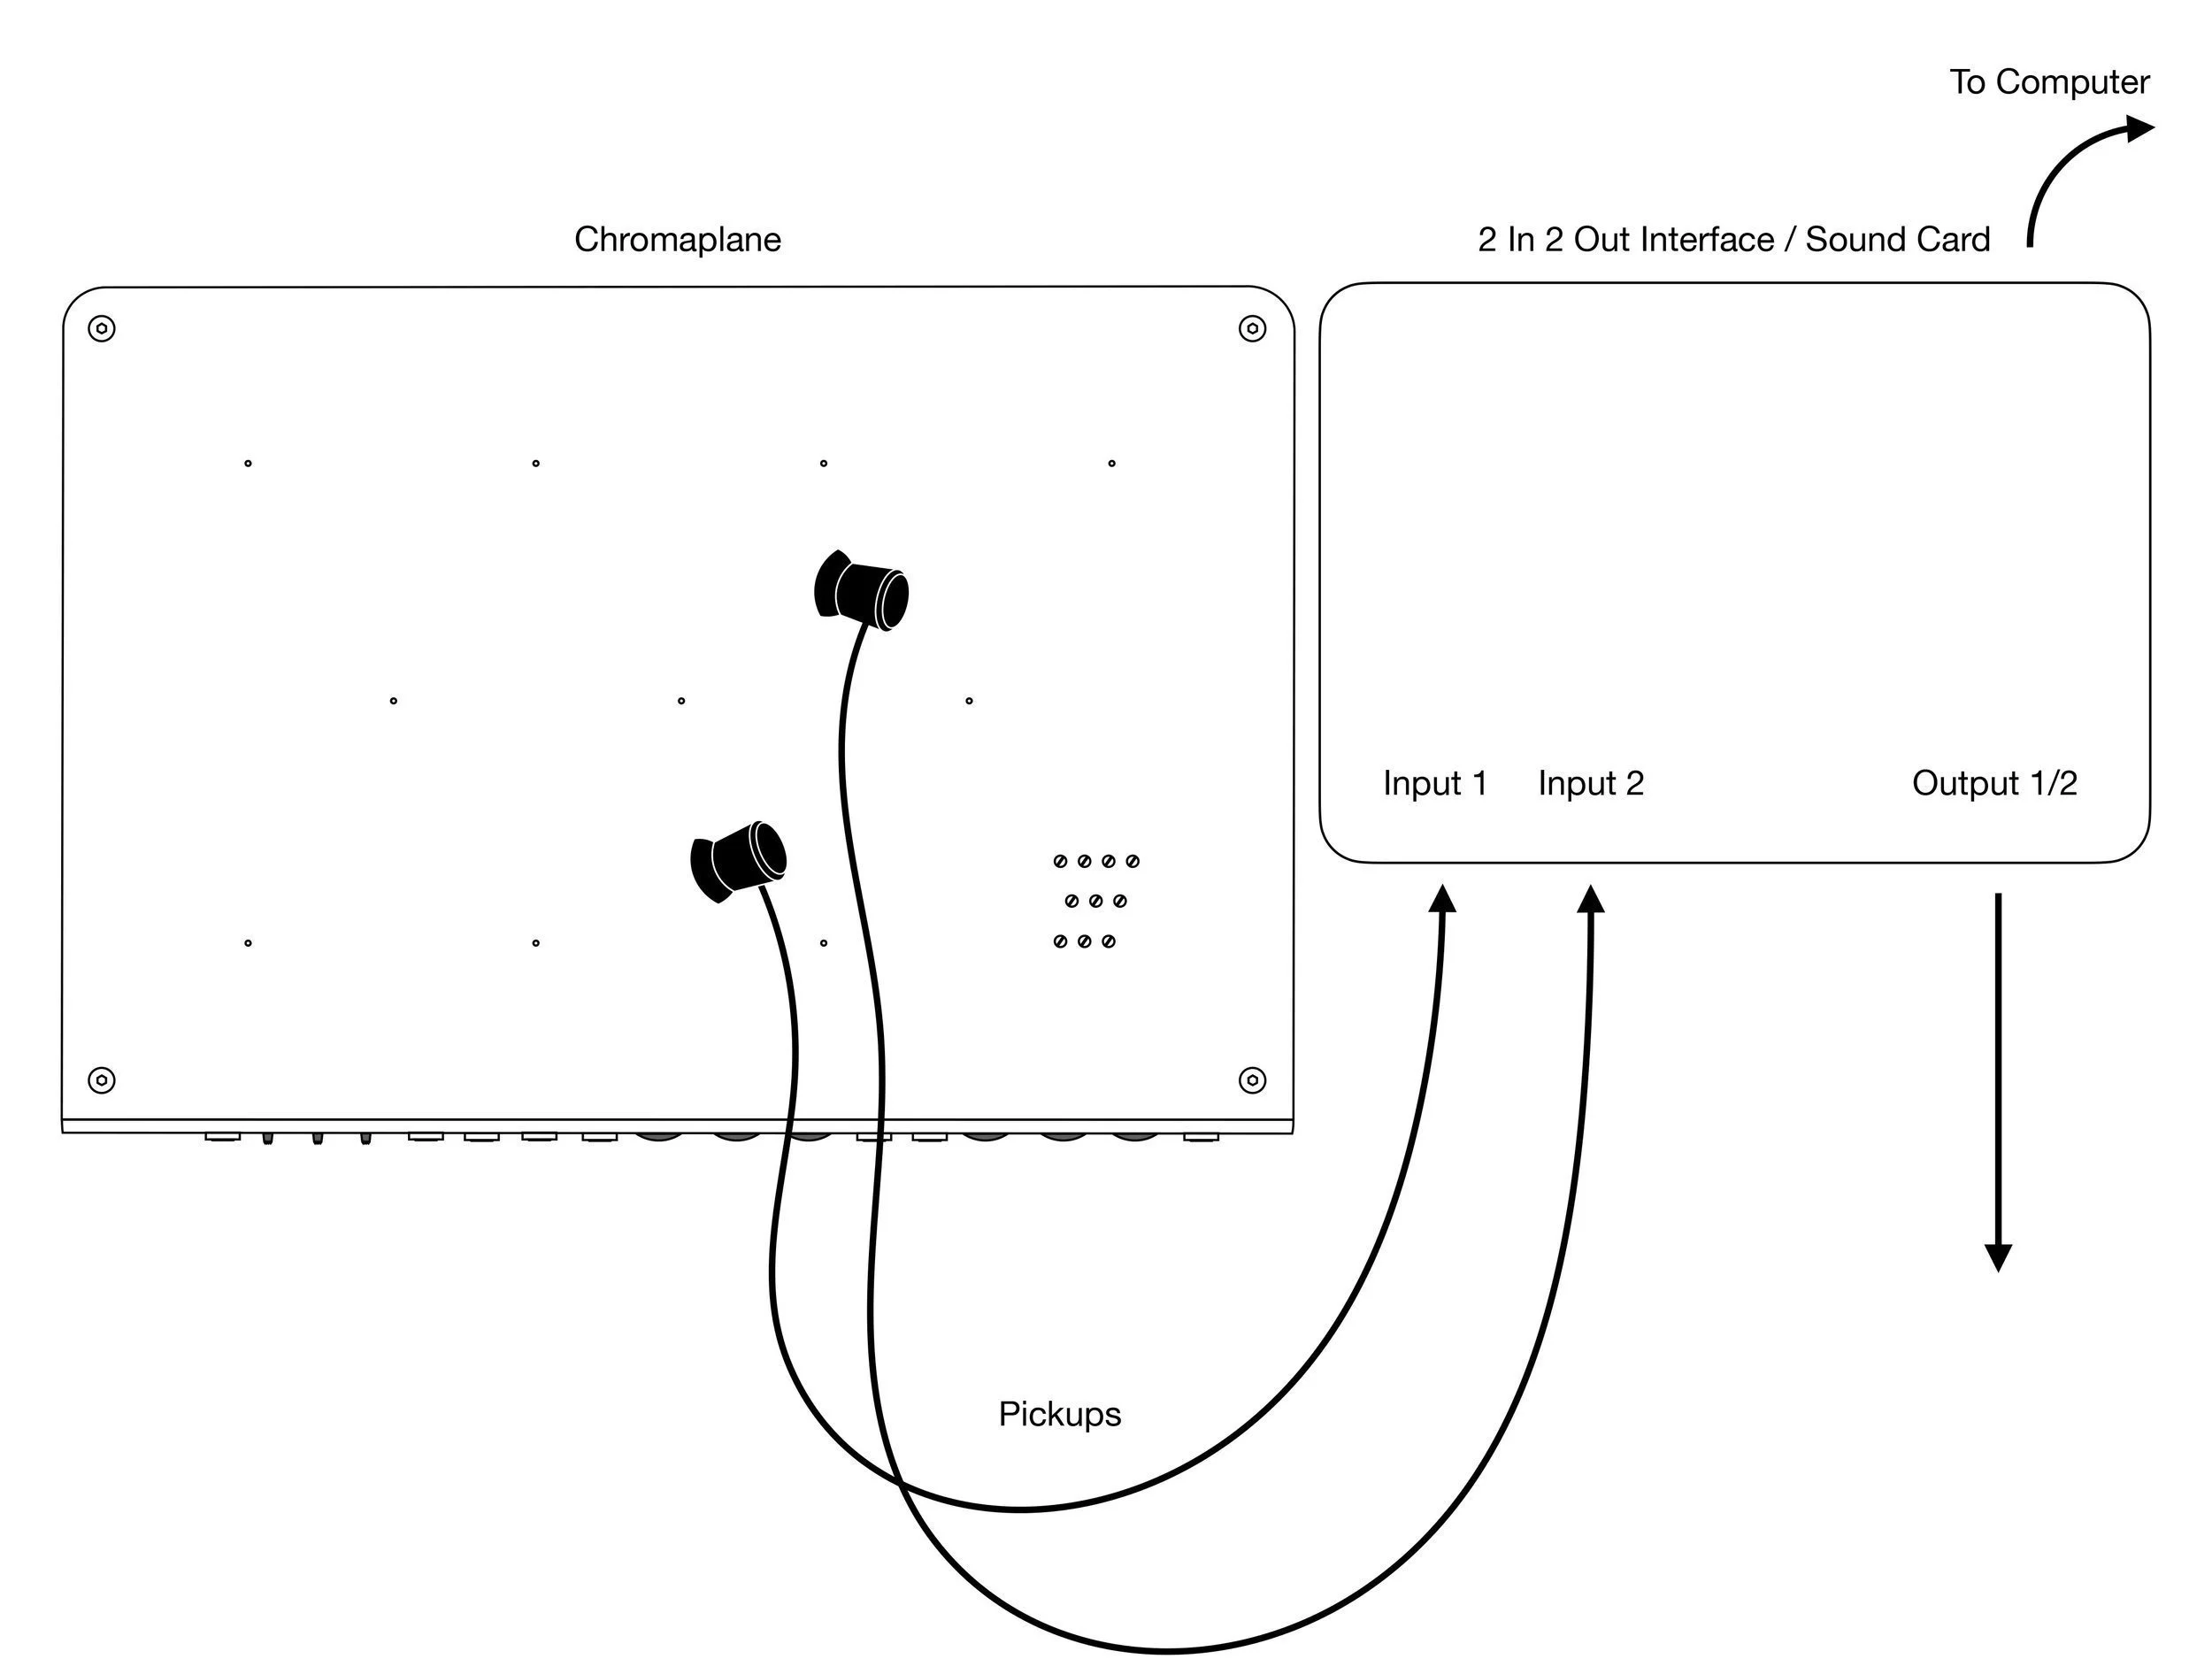
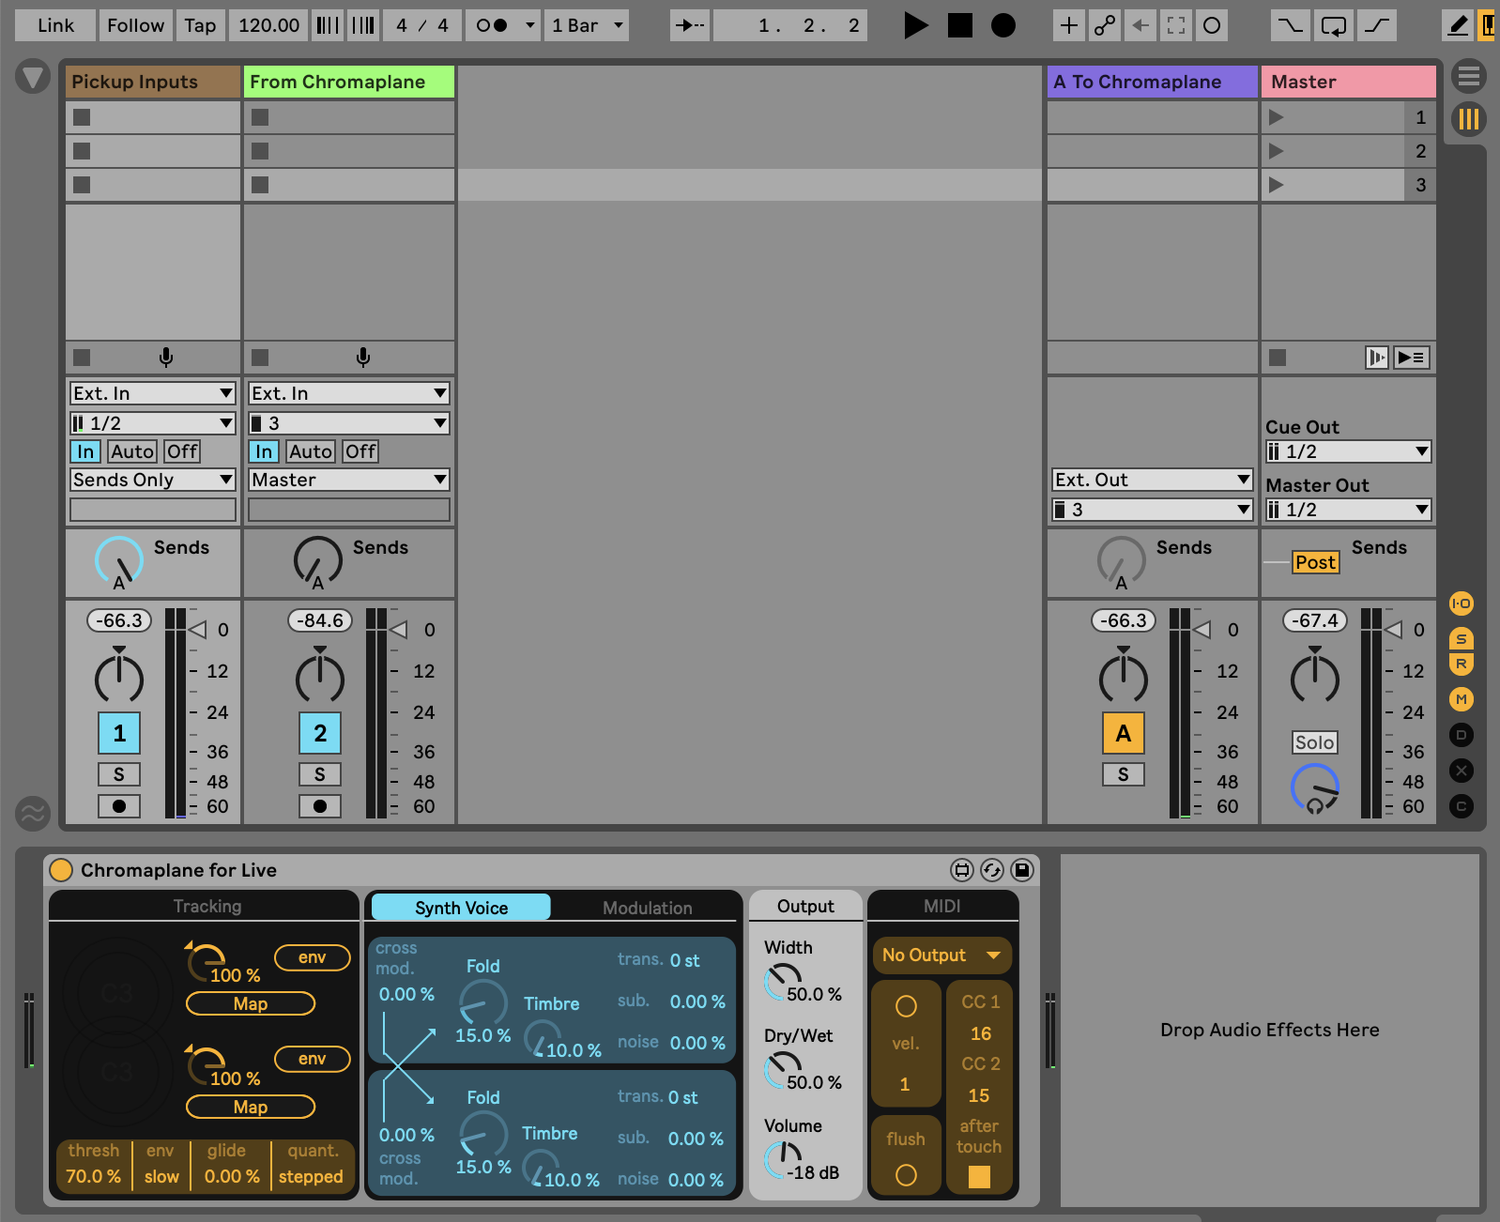
Connect two pickups to two inputs on your interface.
Make a new audio track in Ableton and place the Chromaplane for Live device on that track
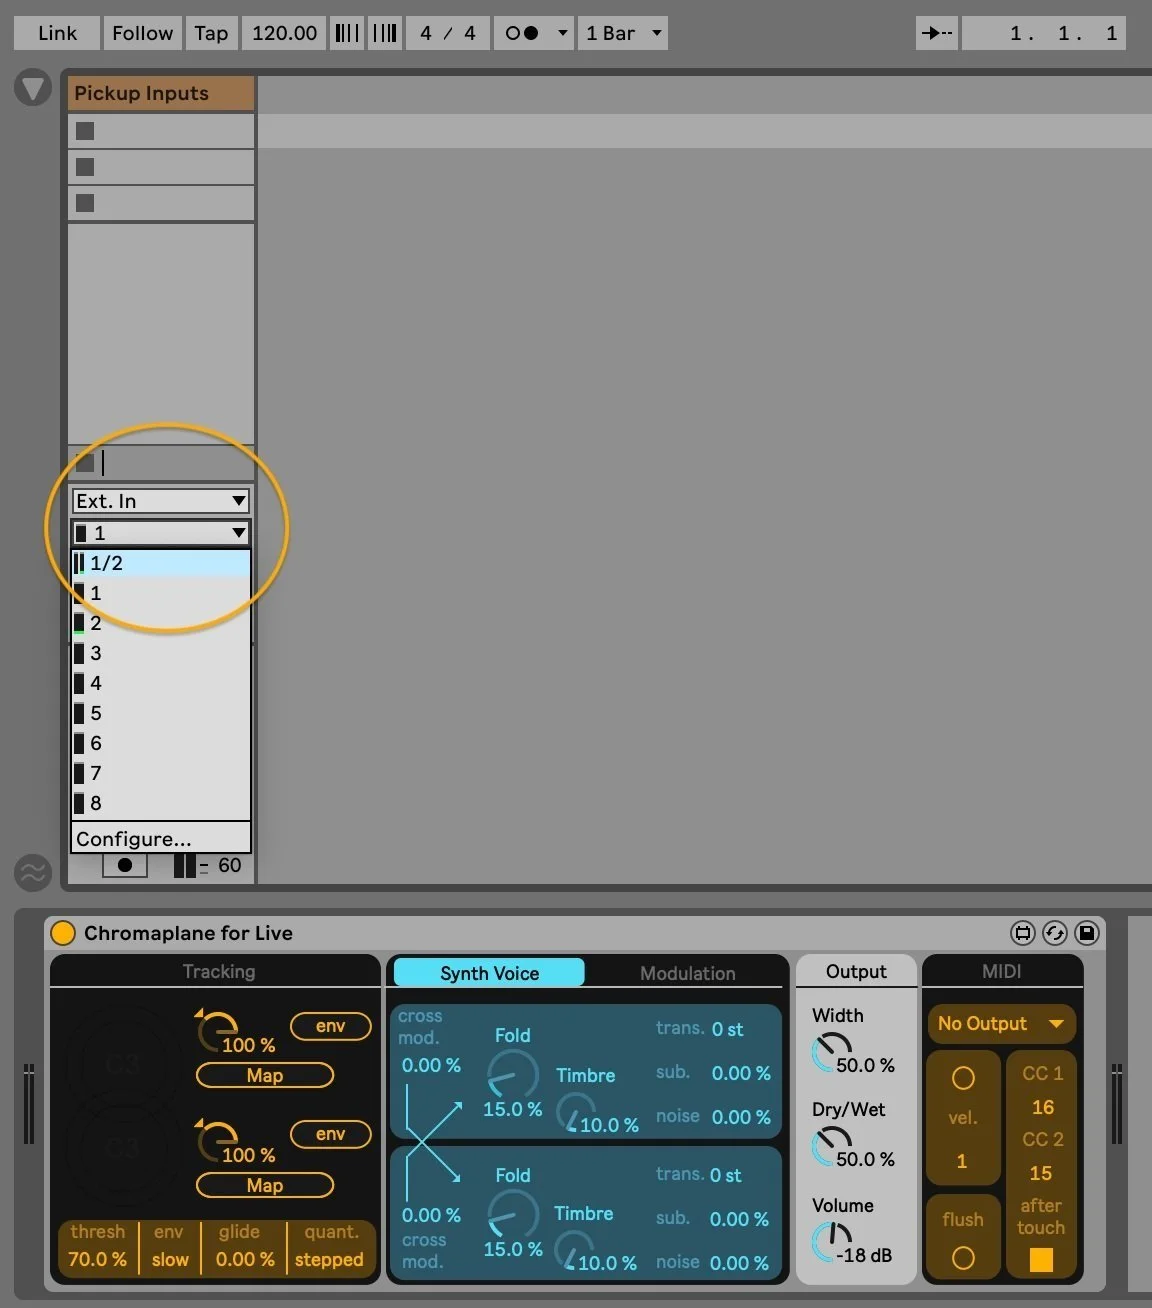
Select the two pickup inputs as a stereo input for that track
Playing with the pickups on the Chromaplane should now trigger the internal digital synth voice of the device. Playing with both the input gain on the interface and the threshold parameter on the device will change the sensitivity of the pitch tracking.
MIDI Routing

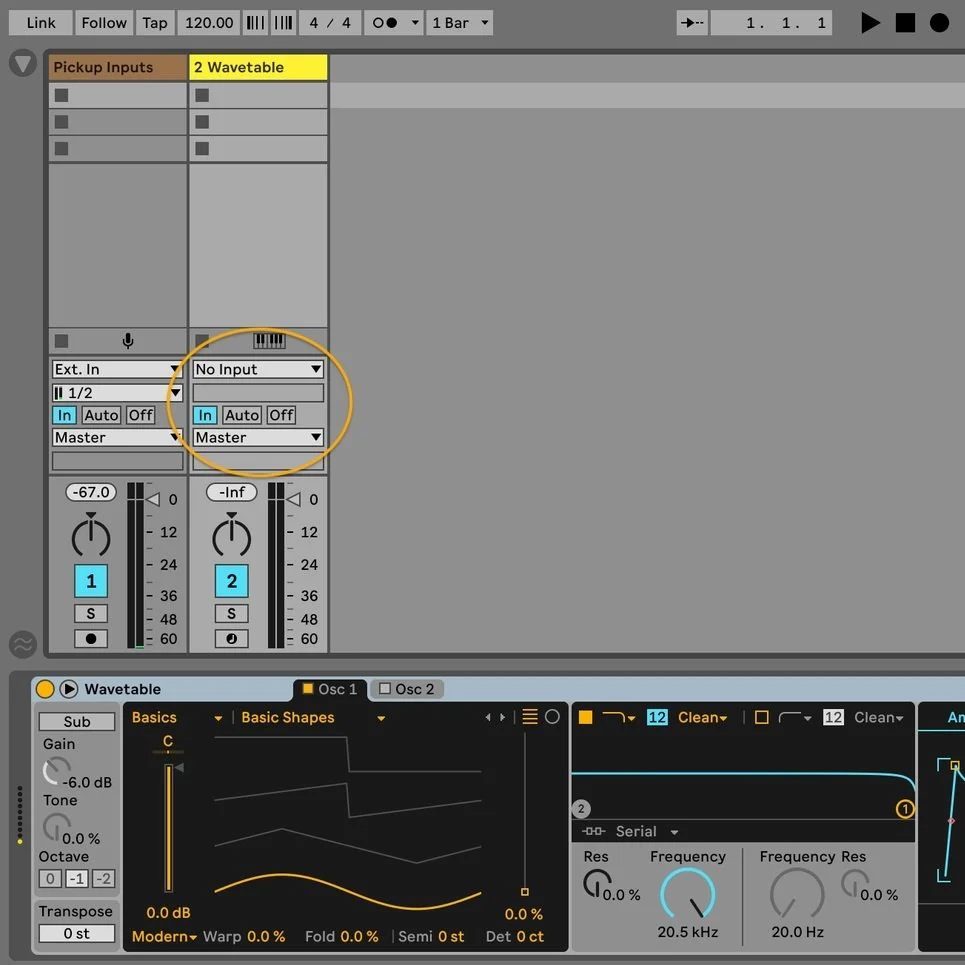
Make a new MIDI track in Ableton and place a MIDI Instrument there
Select that MIDI track in the MIDI dropdown section of the Chromaplane for Live device
Set the MIDI track to “In” or “Auto” (with recording armed)
Select “No Input” for the MIDI track’s input to avoid routing conflicts
You should notice the MIDI instrument reacting to the pitch tracking of the Chromaplane for Live device (note: you may not see the MIDI data being transmitted, even if the device is working correctly.)
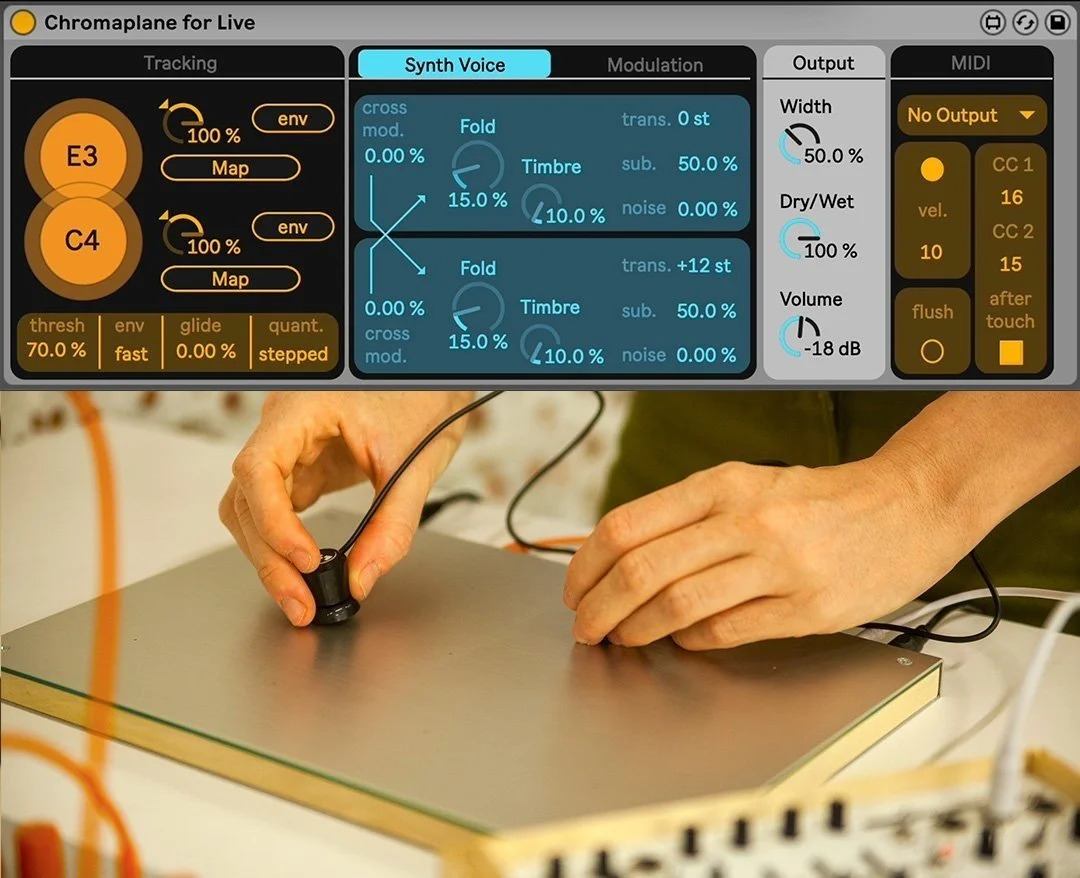
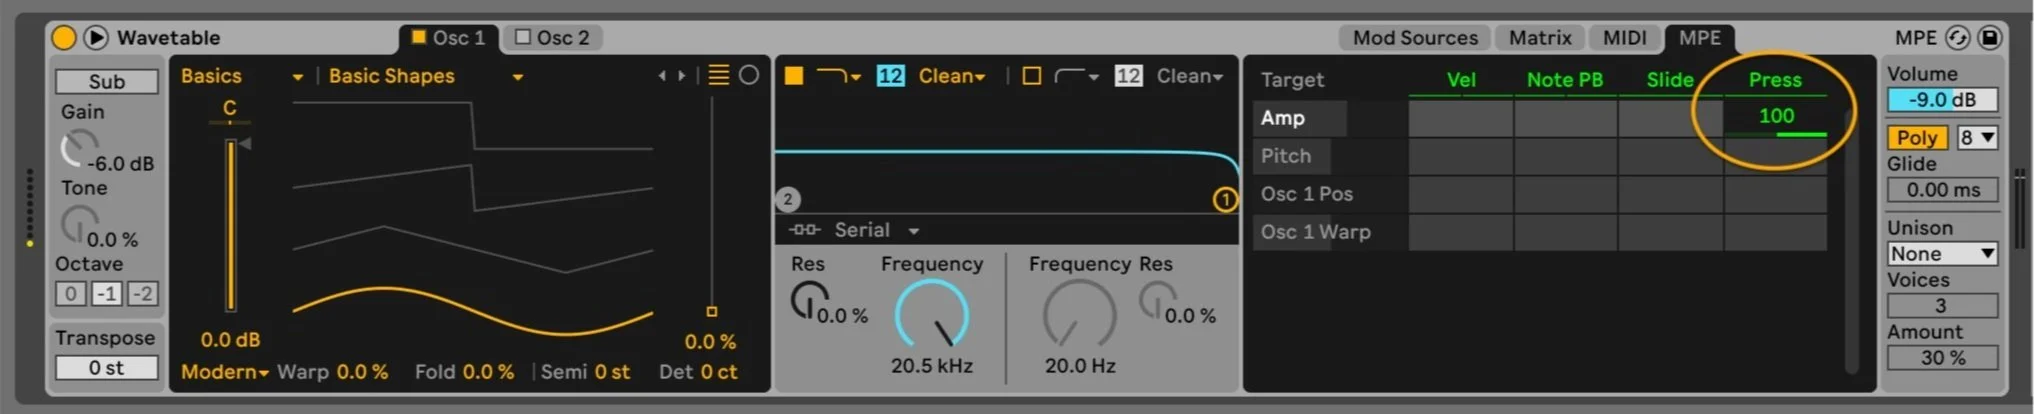
In addition to sending the amplitude envelope of the pickups as two assignable MIDI CC messages, you can also send note pressure by toggling the after touch button. This can provide polyphonic envelope adjustment for each triggered note, so it’s best when used with devices that offer note pressure assignment, like Wavetable shown below.
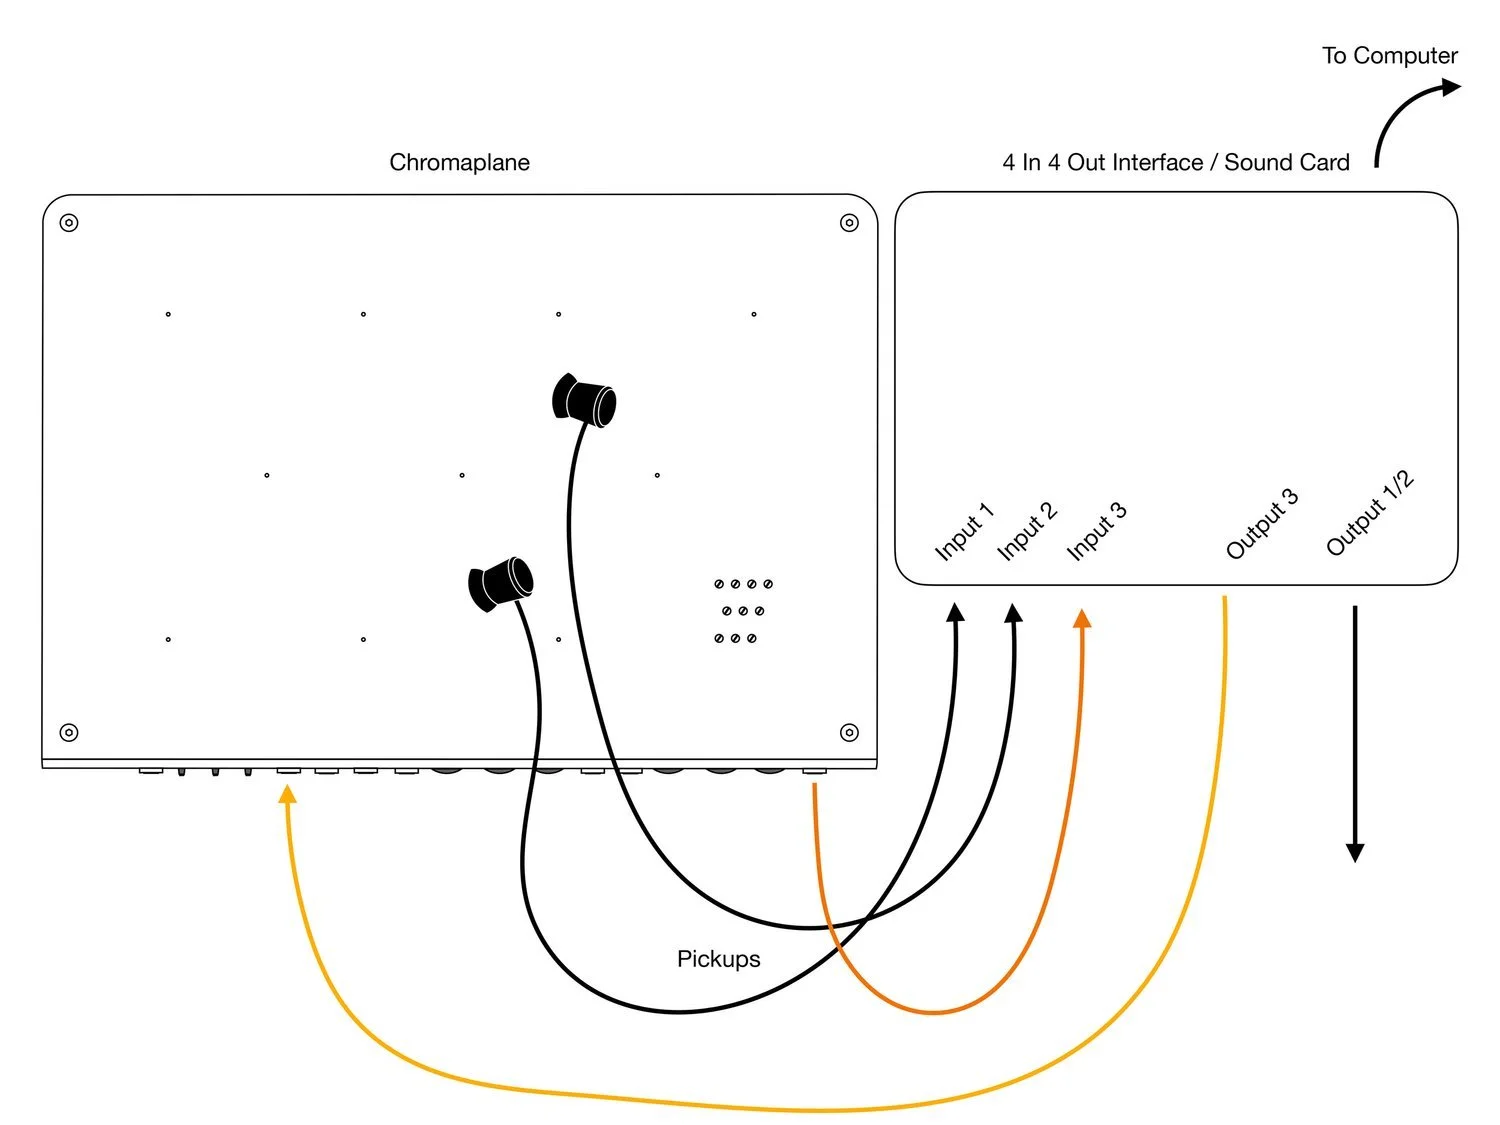
Chromaplane Send/Return
You can also choose to reroute the Max for Live device’s output back through the Chromaplane to make use of its built-in filter and delay, which can help further meld the original instrument’s sound with the processed sounds of the Max for Live device. You’ll need an interface with at least 3 inputs and 3 outputs to achieve this. Because the pickup inputs on the Chromaplane have their gain preset for the pickups, you’ll need to reduce the output level of the send output in Ableton to avoid clipping.
Bugs or issues?
Tell us and we will try to fix it!
passepartoutduo@gmail.com